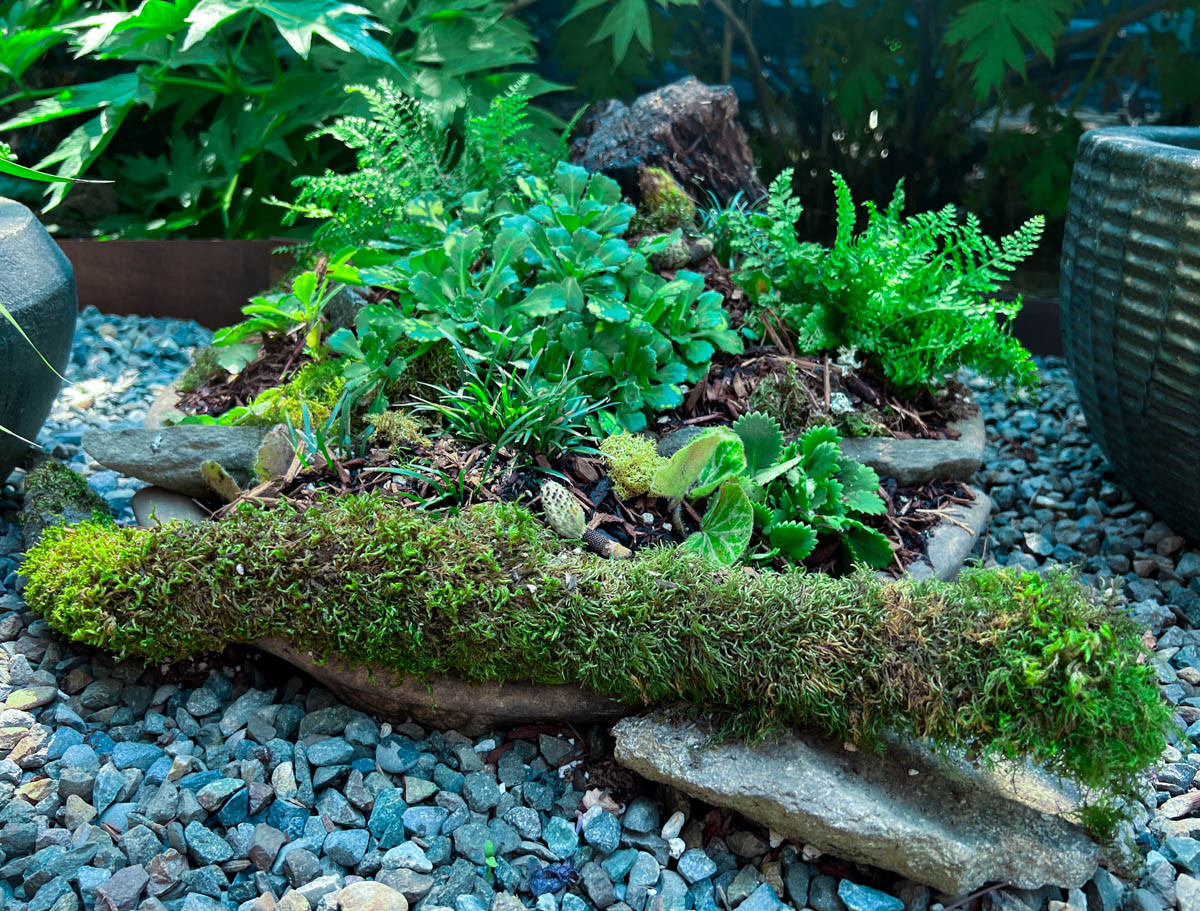
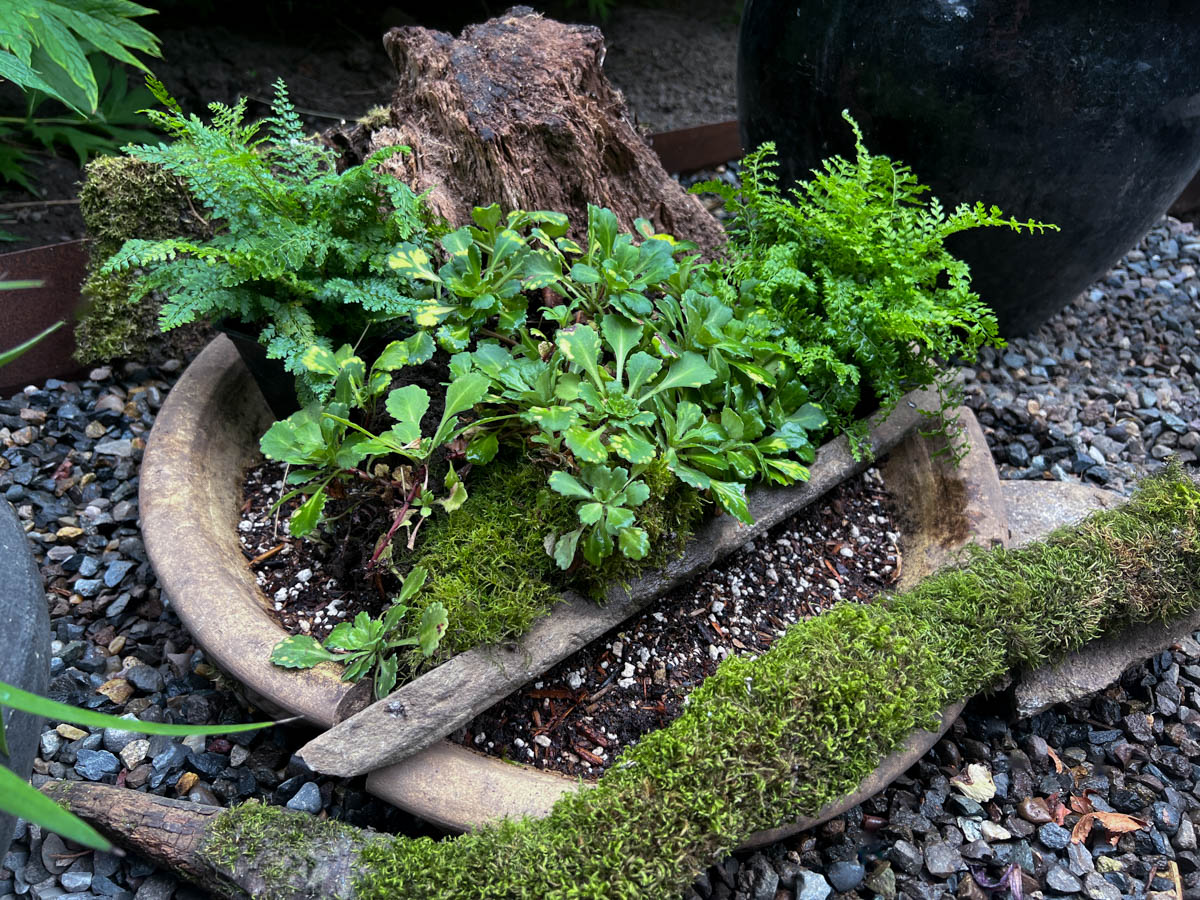
The low profile of a birdbath makes a nice silhouette repurposed as a planter. The shallow basin with a relatively big surface area presents an excellent canvas for a beautiful miniature landscape of little plants and natural materials.
1. Create a new planter for next-to-nothing
I made this woodland-inspired planter entirely out of items found around my own yard. I had some soil and plants already on hand, but even if I didn’t, I could have kept new purchases to an absolute minimum, as the only other materials were foraged branches and rocks.
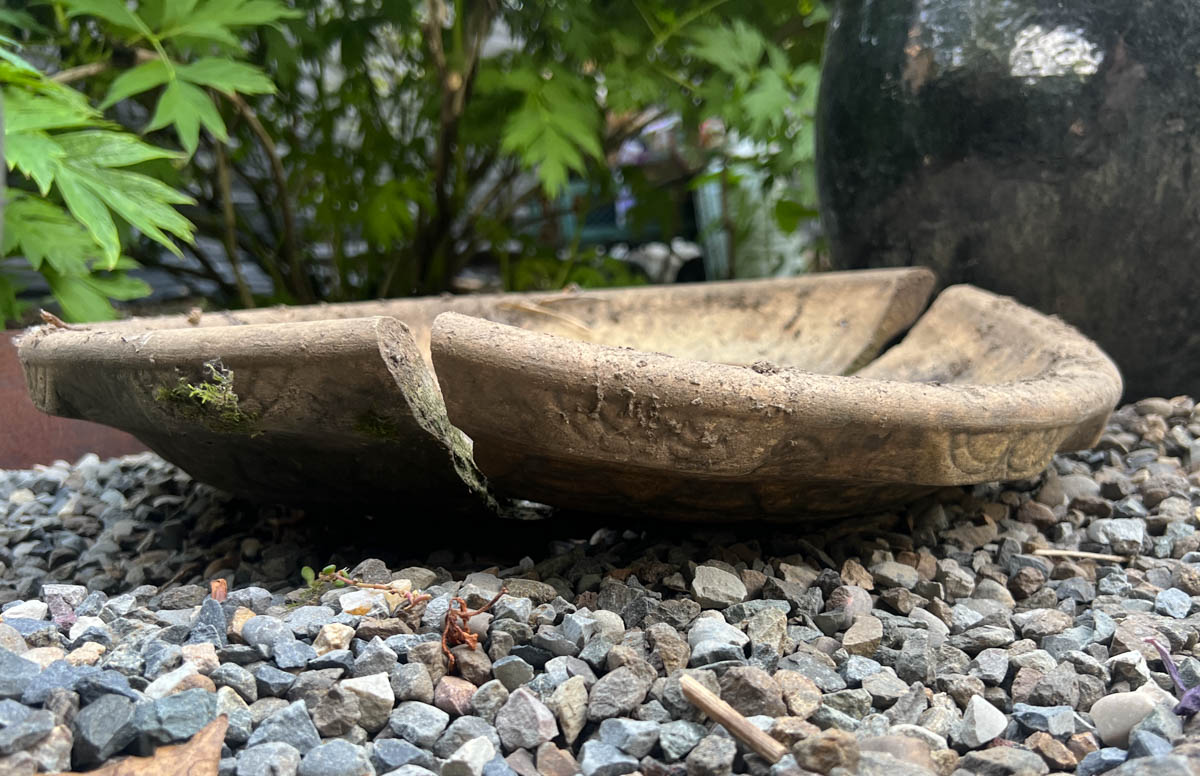
Broken birdbaths that no longer hold water are great to repurpose as planters, and you can often find them for free. Many people are happy to give them away to a gardener hoping to give them a second life.

2. Grow plants that multiply on their own
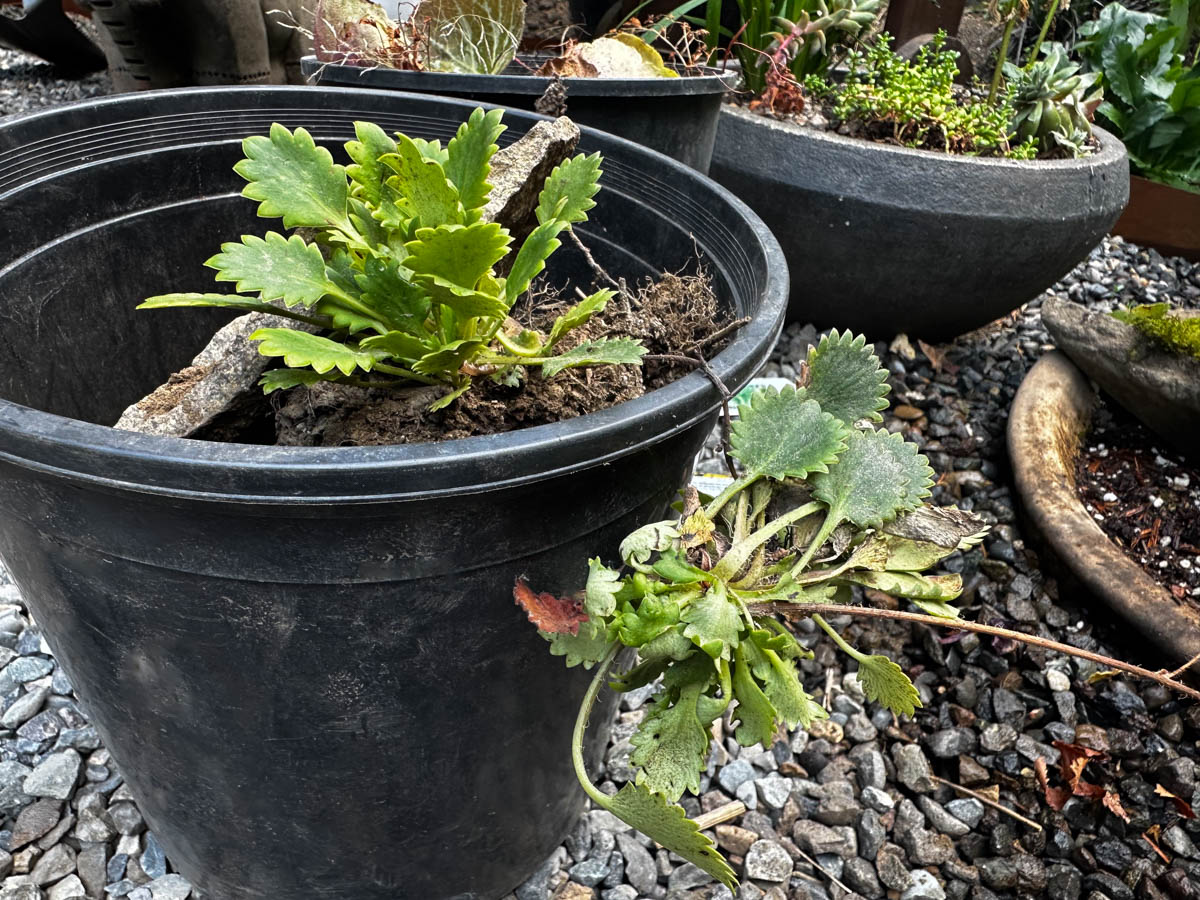
I wish I’d learned sooner how valuable it is to plant things that spread and transplant easily. It’s handy to grow plants that can just be separated from a parent plant and directly planted elsewhere without a lot of extra attention.
Now I have a decent collection of plants I can browse in my own garden, which makes projects like this free. As a bonus, gardening pals are often open to sharing plant starts, which is another great option for growing a plant collection while conserving resources.
3. Set up the foundation for planting
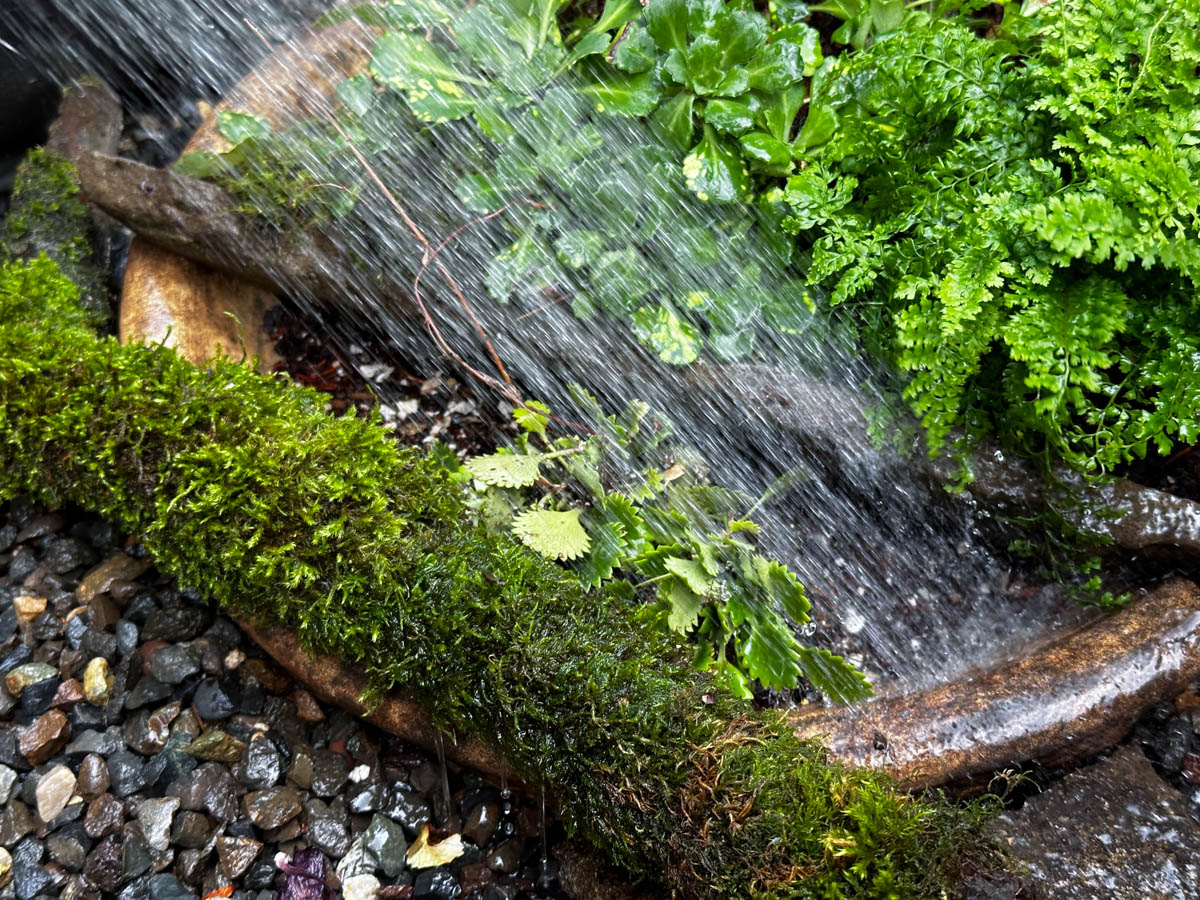
Fully split into two pieces, the crack in the birdbath acts as a great drainage hole. I tested the drainage by filling it with water and adjusting the angle so gravity would ensure that the water wouldn’t pool. Poor drainage can be the kiss of death in many container plantings.
My planter is seated on gravel so that’s what I used for leveling adjustments, but if it were on solid ground, I would have used other rocks or broken pots as shims to get the angle just right.
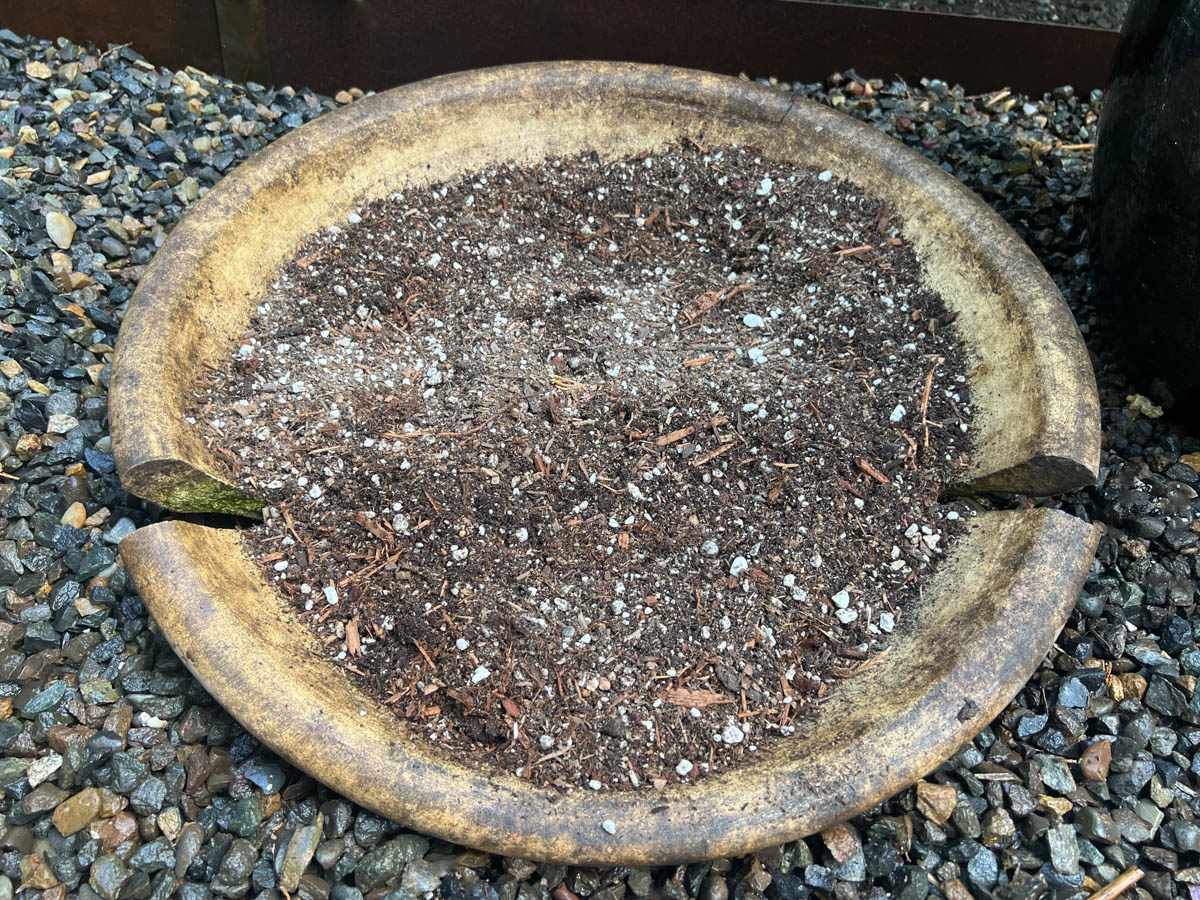
Cleaned out and ready to go, I created the foundation for the planting. Birdbaths are quite shallow, so the goal is to add height to hold as much soil as possible. The more soil you incorporate, the more moisture it retains, so you don’t have to water as frequently.
I found a long narrow piece of flagstone that worked well as a mini retaining wall. I checked the height to make sure it would raise the soil level up to the crown of the tallest root ball.

If plants sat up too high, the soil would to wash down when watering. The goal here is to plant at the correct level, without fighting gravity. Not visible in the finished planting, I also added some smaller rocks as needed to retain soil around the taller plants.
4. Add the right soil
I’ve seen people try to cut costs using regular garden soil in planters, but this is a place where it’s counterproductive to cut corners.
For the plants in this container, I mixed pumice for improved drainage with a general potting mix. I started with a base layer, so I could sink my foundation pieces firmly into soil without leaving air pockets.
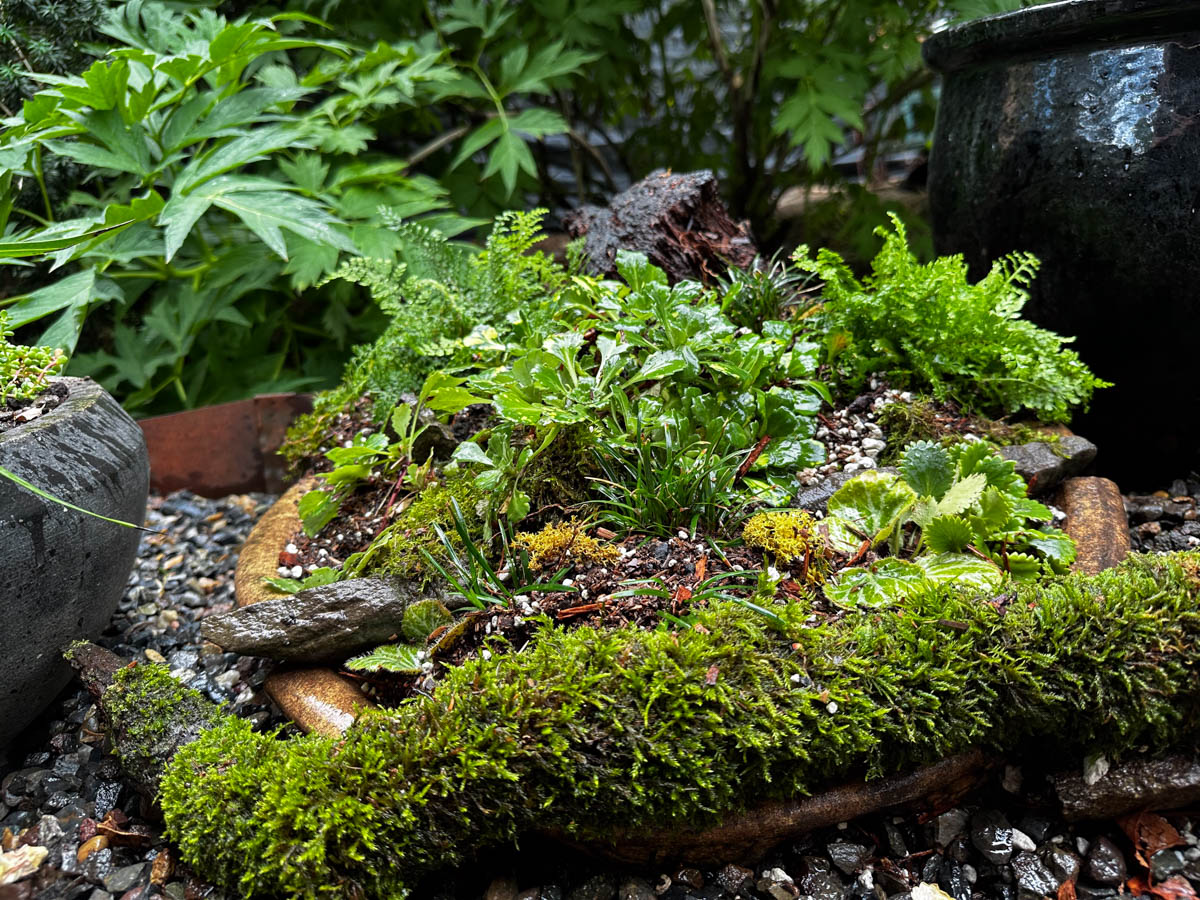
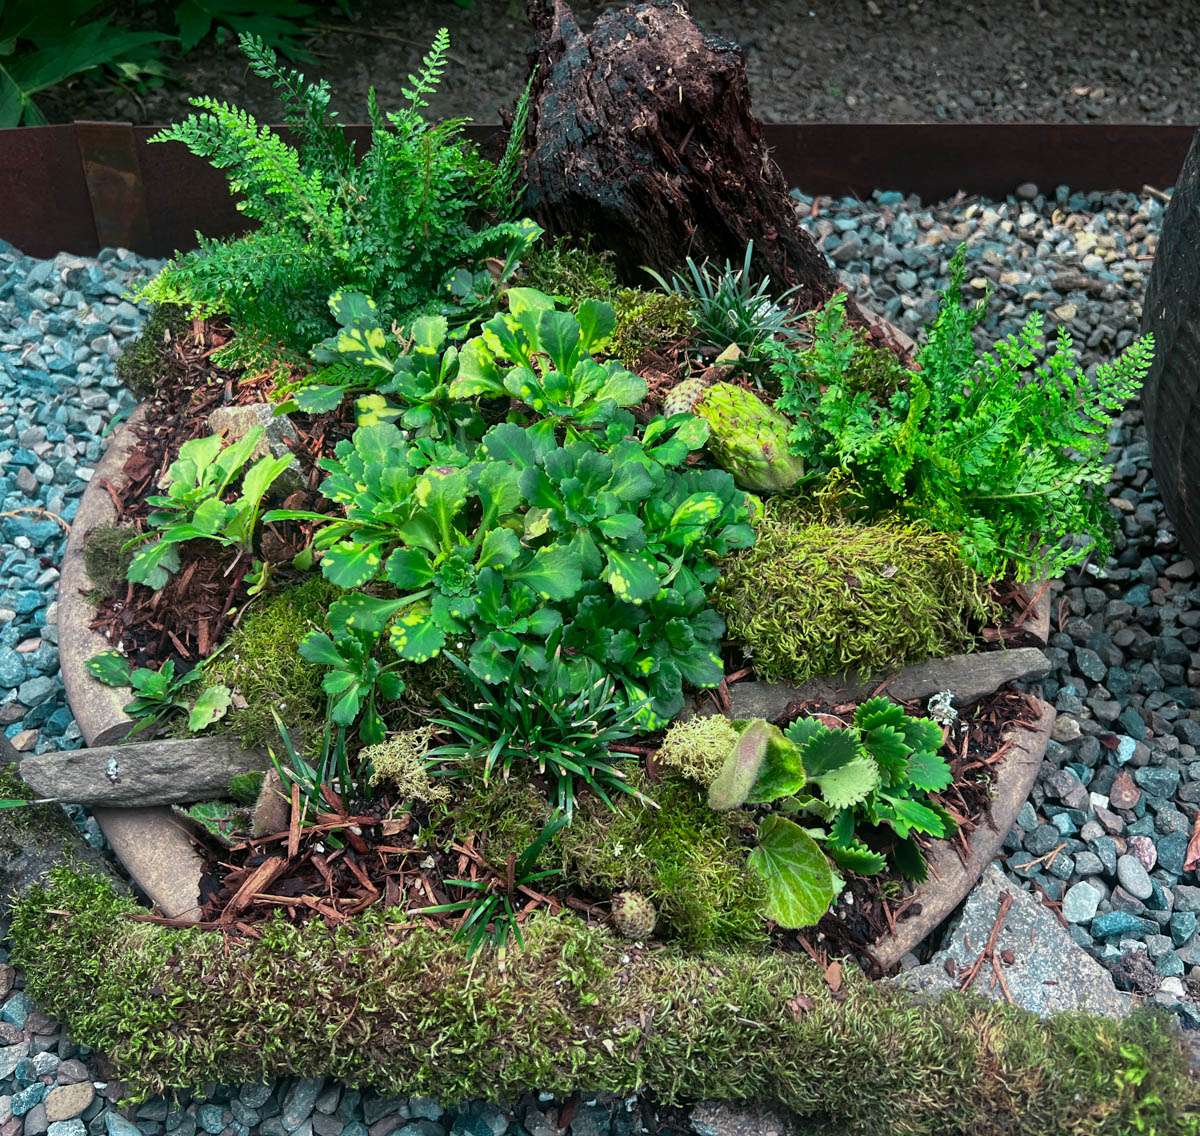
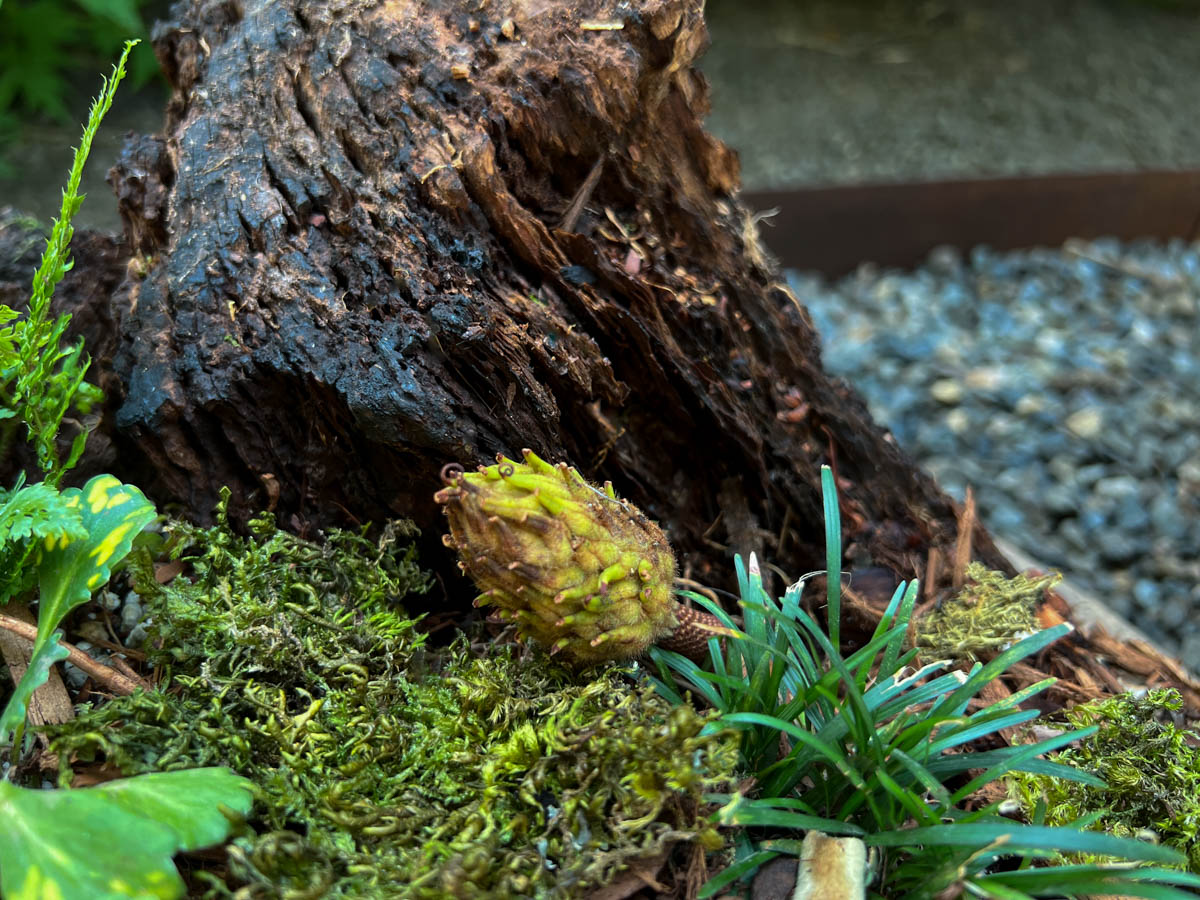
Next, I added some extra foundation pieces: a chunk of decomposed cherry tree stump, and a mossy branch stabilized by another rock outside the pot.
I could have wired the pieces together by drilling holes in the birdbath. This would make it a little easier to move this piece around, but I like the flexibility of being able to rearrange it at will. Plus I’m happy with the look of things naturally cascading around the border of the pot.
5. Add plants
The appeal of a miniature landscape is in contrasting shapes, textures, silhouettes, and shades of green that look gorgeous all year round. This is where you get to rearrange until you’re happy with the mix.
Healthy, happy plants are always the goal, so the mission here is to pick plants that thrive in containers and rock gardens, since this is a hybrid. My planter will only receive dappled sun, so I’ve picked plants that also enjoy woodland conditions.
I found the easiest technique was to set tiny plantlets in place before adding soil, then backfilling. That seemed the best way to get things in place at the proper depth without overhandling the roots.
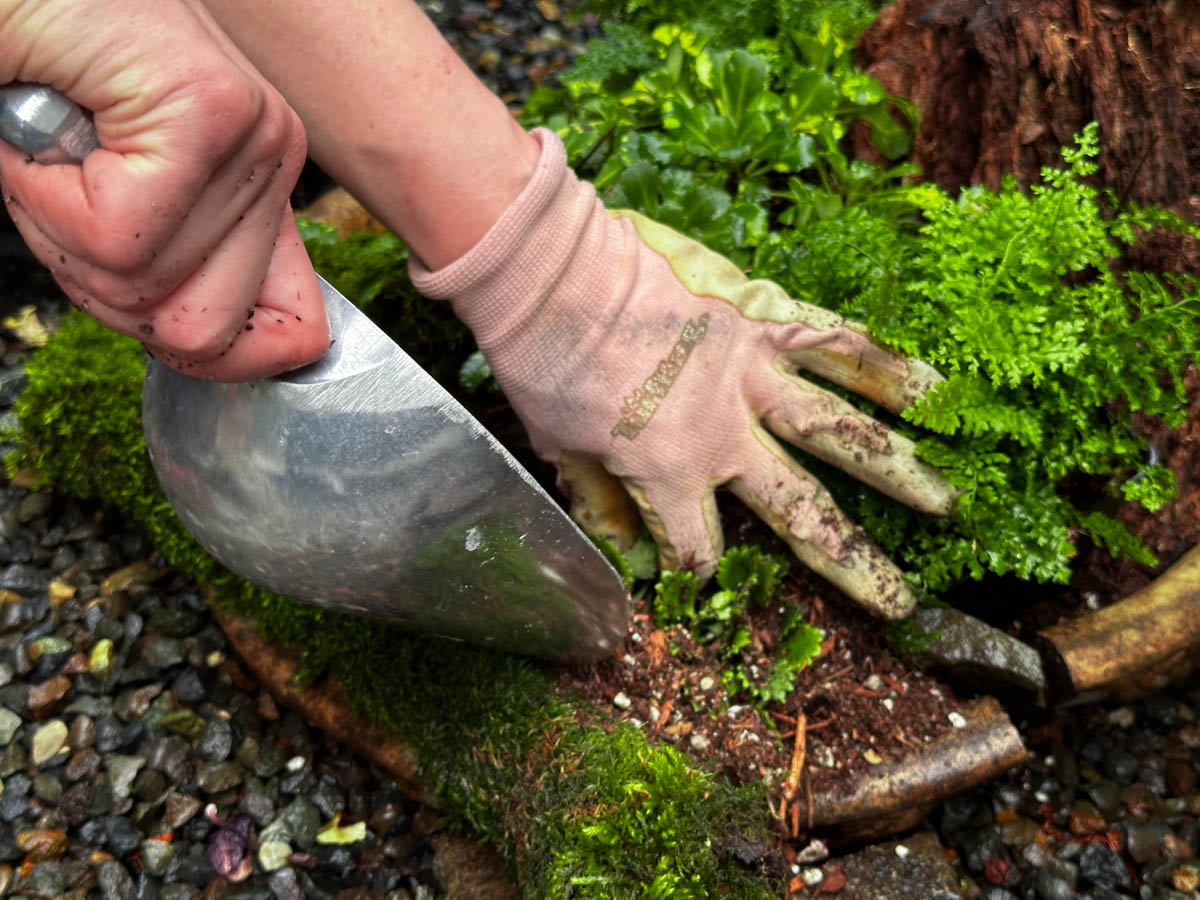
Soil will definitely get everywhere and it doesn’t look very pretty while planting is in progress. I find it easier to stand back and assess what needs tweaking if I keep water handy to tidy up as I go.
At this stage I was happy with the bones but had a couple remaining bald spots between the rock and the mossy root, so I went foraging around the yard once again.
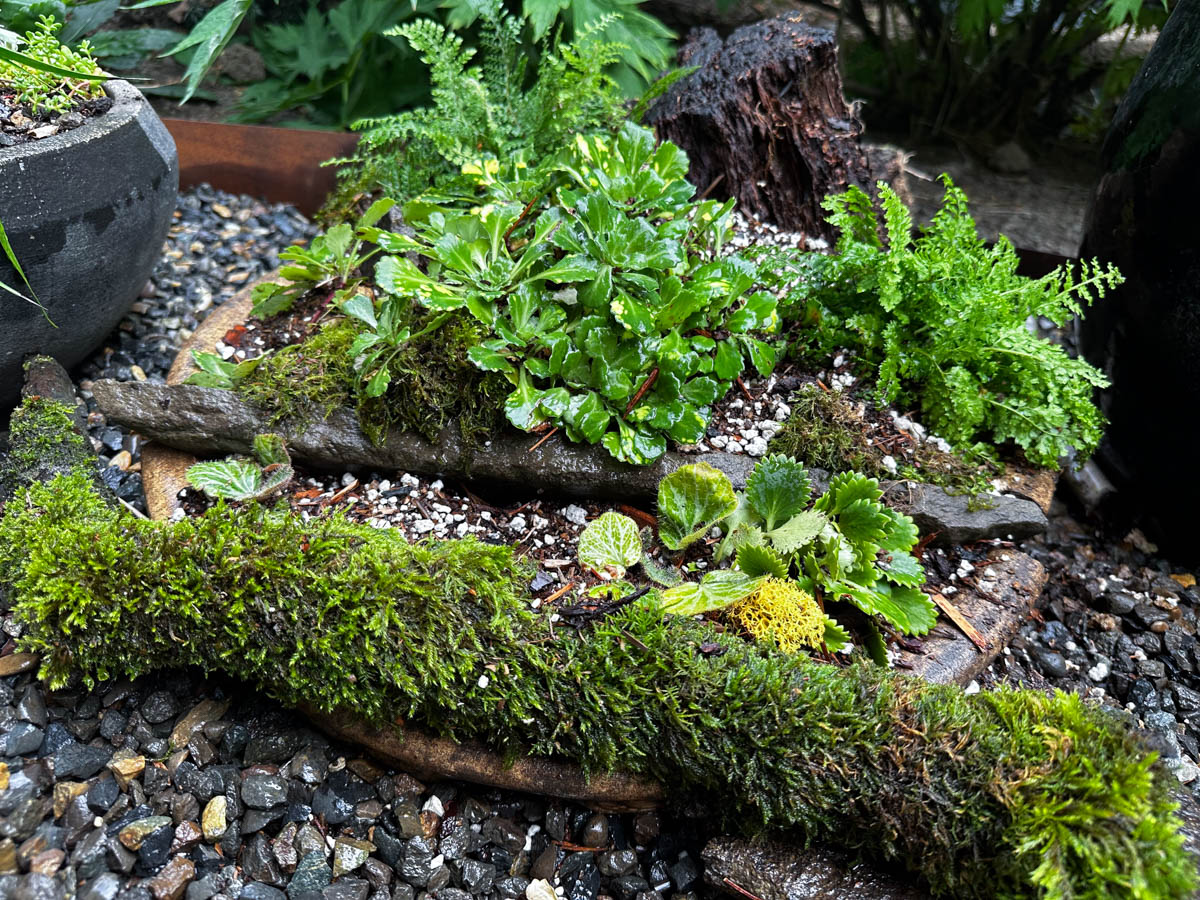
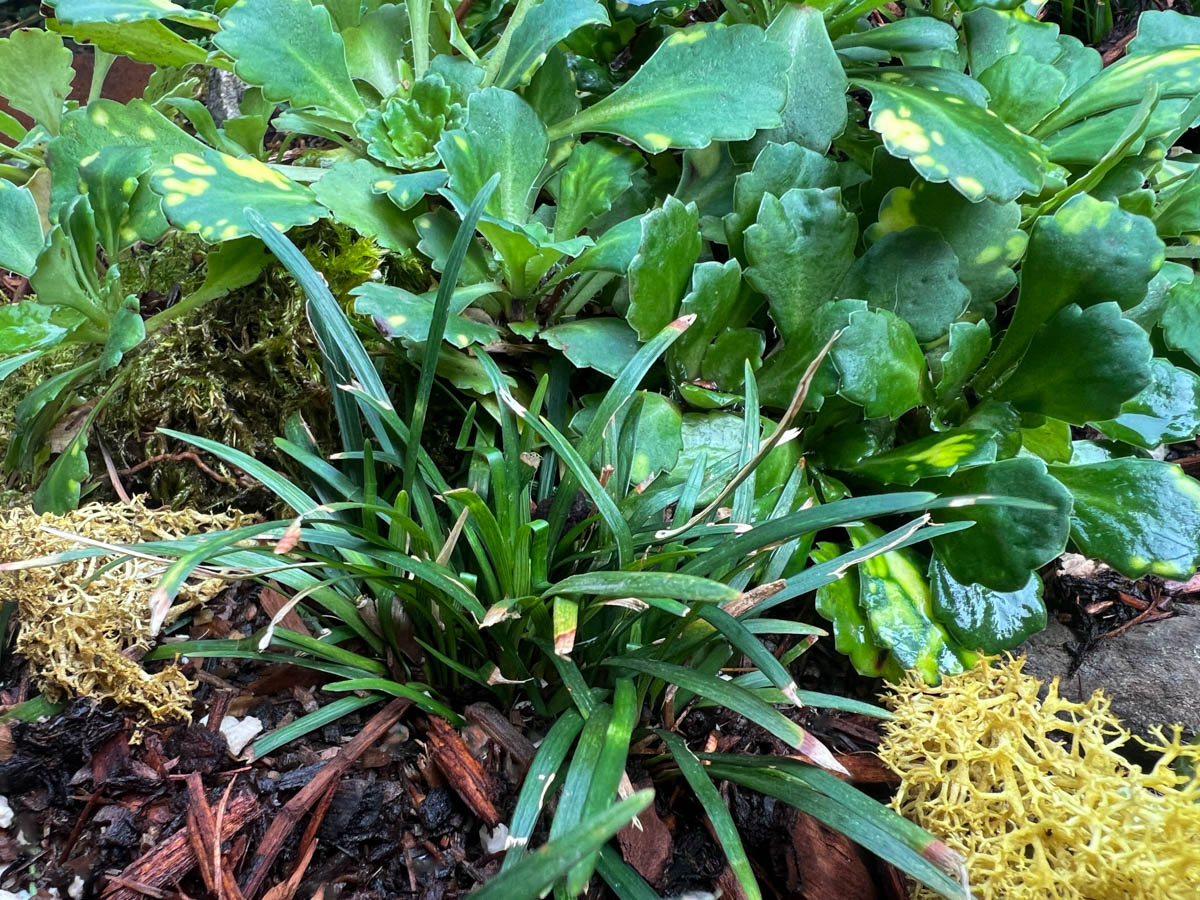
I came back with a few tufts of dwarf mondo grass that tucked in nicely and seemed just right.
At this stage the planting was feeling pretty complete. I’m happy with the angles and the composition, the way things appear to be cascading from an aging stump, as though they long ago planted themselves near a forest stream.
6. Finishing touches
After planting, I mulched with hemlock bark to reduce evaporation and keep roots cooler, while hiding the pumice in the soil mix.
Using bark mulch is new to me. I thought it was always a sliver-y orange mess for commercial parking lots. However, I learned you can find naturally darker hemlock bark, which is considered sliverless, and is an environmentally friendly and sustainable byproduct of lumber locally sourced throughout most of the US.

The other thing I like about these little mixed planters is that you can tuck in little treasures to keep evolving and seasonally refreshing them without buying a thing. Moss, lichen, and seedpods on the sidewalk often come home in my pocket, and this gives me a nice way to display and appreciate them.
7. Maintaining birdbath planters
Because they hold limited soil, you need to keep an eye on them and water more often. If you’ve chosen plants that will outgrow the space, they will need division or replacement over time, which is a fun opportunity to refresh the container with fresh selections.
With such a small space, damaged leaves and old stems will stand out more than they do in the garden. It’s quick to tend a miniature garden like this, and a somewhat meditative experience to tidy up. Keep a pair of snips handy to clean up any spent bits and keep things looking fresh.
About the plants
Saxifraga
Saxifraga is an especially great genus of plants that politely multiply and make it easy to make more on demand. This planter ended up with 3 different Saxifragas. I’ve thoroughly caught the collector’s bug for this genus as I’ve come to appreciate their easy nature. Often growing in alpine habitats and crevices, they are especially good for tucking into a miniature rocky container planting like this.
Saxifraga ‘Aureopunctata’
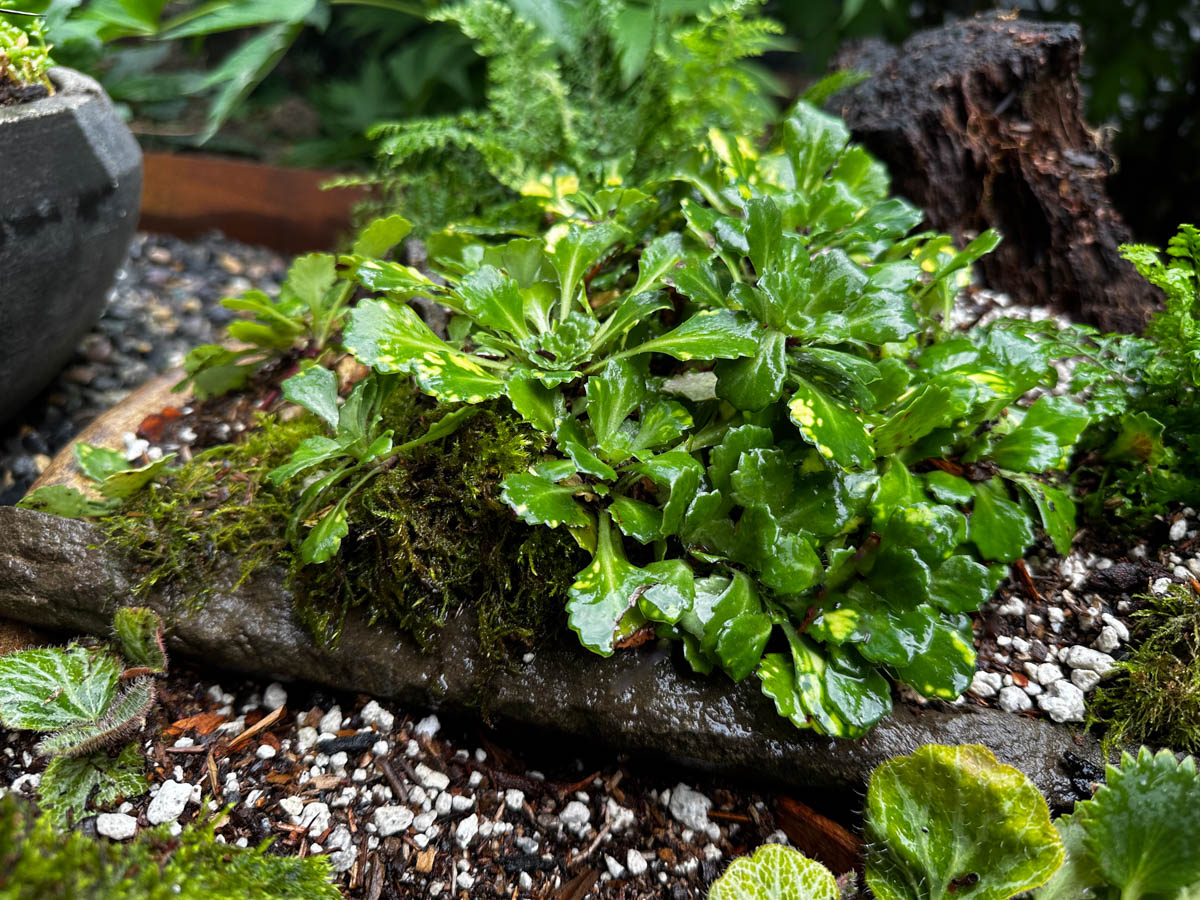
Saxifraga ‘Aureopunctata’ is a rock-star that works in so many places. What’s so great about it?
- Succulent rosettes of mounding variegated foliage
- Easy to grow in any shady spot
- Fabulous in containers, rock walls and along the edges of paths
- Spreads politely but plentifully enough to grow your own collection and share with friends
- So easy to divide and move bits and pieces all around the garden, no babying needed
- Weeks long blooms of tiny whitish pink flowers on 18″ wiry stems
Mossy soft shield fern, Polystichum setiferum-plumosomultilobum group
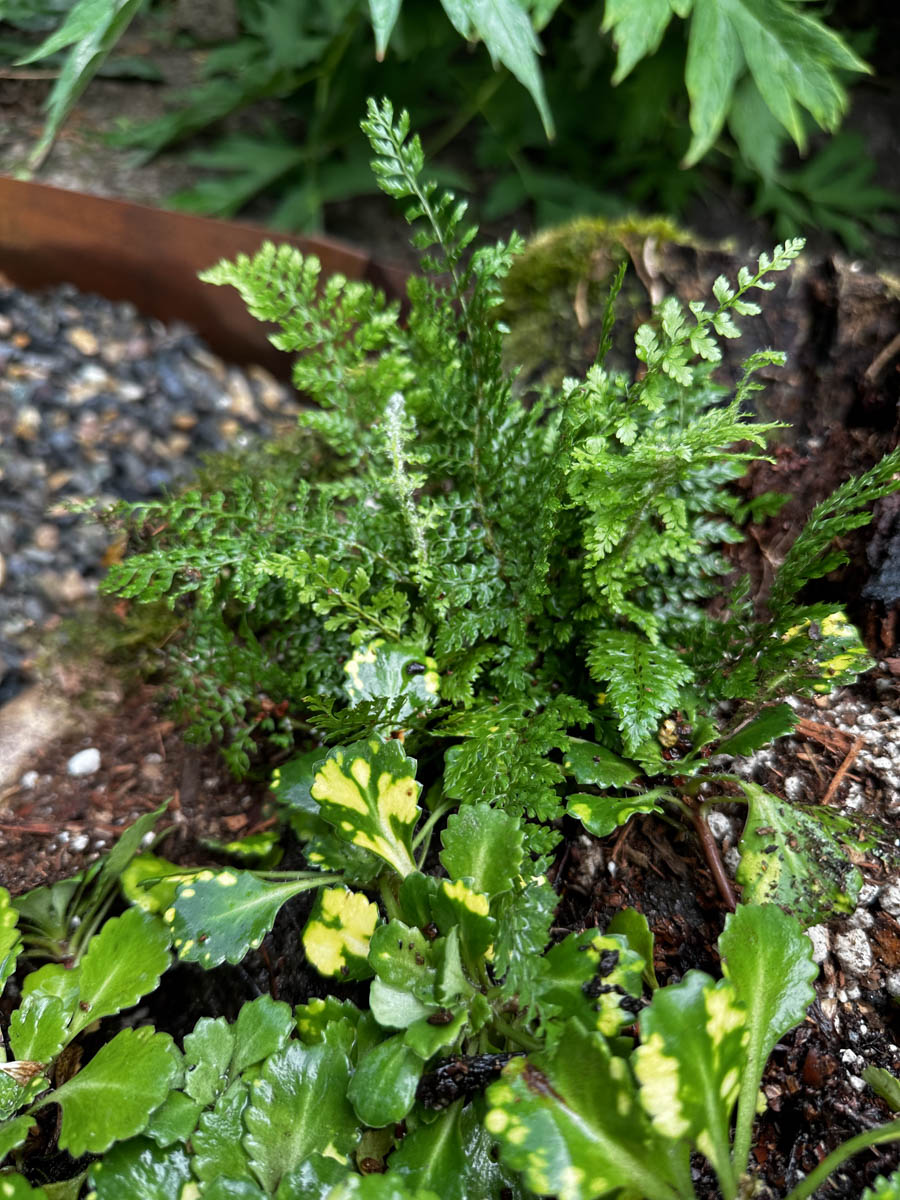
Some latin names get unwieldy. I have a hard time remembering the name of Polystichum setiferum Plumosomultilobum Group but as the common name Mossy Soft Shield Ferm implies, they make this planting feel lush and dreamy.
Growing up to 18″, it’ll move into the garden when it outgrows the pot, to be replaced by… who knows? A miniature hosta could be really pretty in its place.
- Upright vase shape
- Delicate looking but durable
- Deliciously textured foliage
- Good in rock gardens and containers
Saxifraga stolonifera
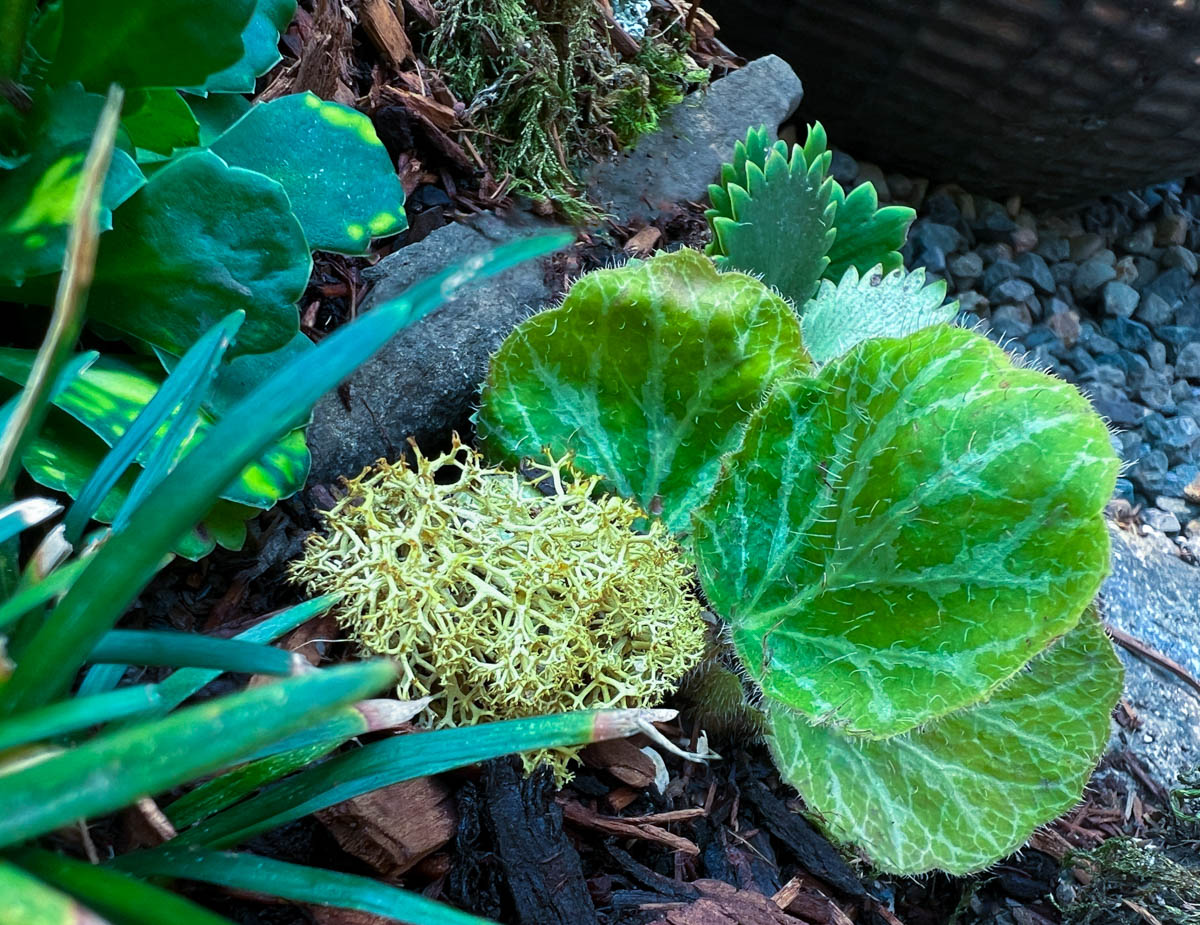
A classic beloved spreader, Saxifraga stolonifera is never a nuisance, but one of those wonderful plants you can easily make more of to grow your own collection and share around. It’s perfect for rockeries and containers, even though many know it as a long-popular houseplant.
- Runners and babies cascade over the edges of planters, similar to strawberries
- Fantastic fuzzy leaf texture
- Beautiful leaf veining up top, maroon on the underside
- Cute white flowers rise on wiry stems
Saxifraga x geum dentata
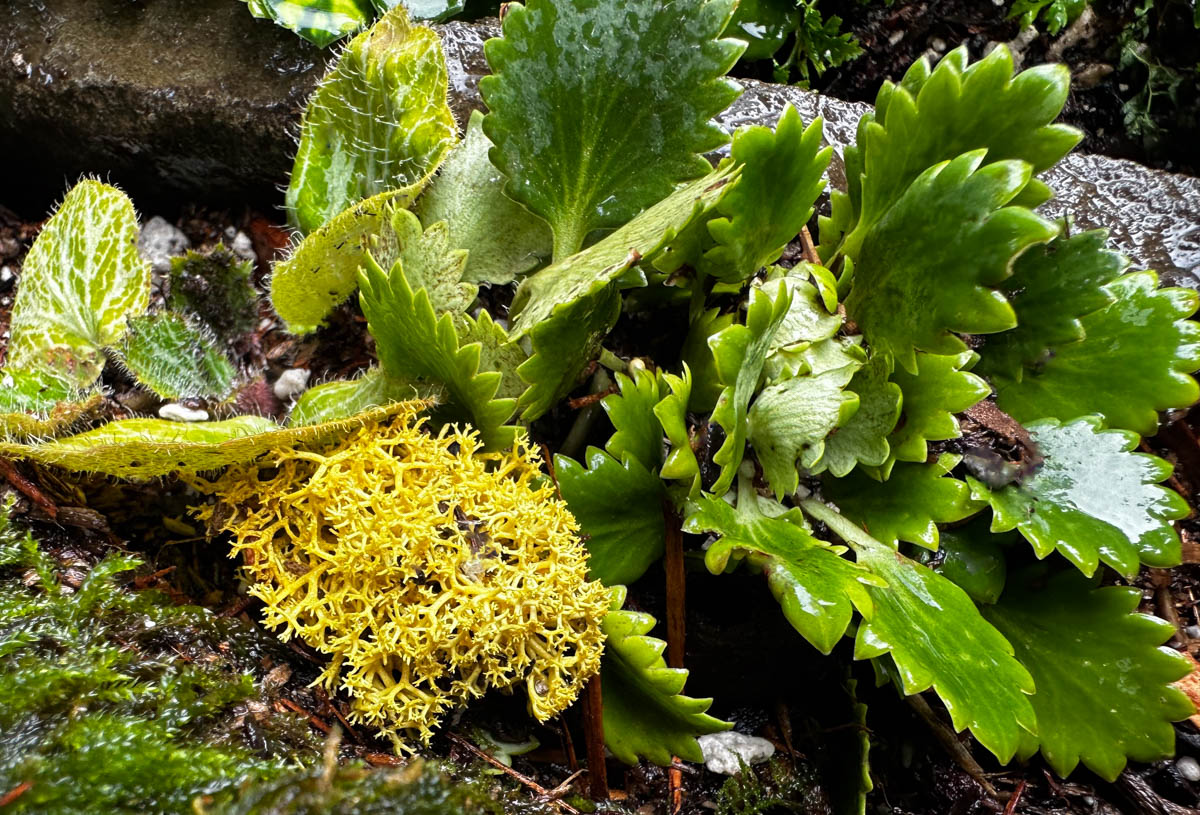
Saxifraga x geum ‘Dentata’ has those serrated leaves! 😍 What else is there to love?
- Easy to grow groundcover
- Dense mounding rosette of leaves that appear cut with pinking shears
- Clusters of little white flowers spotted with red on tall stems in spring
Dwarf Mondo Grass
The humble little Ophiopogon japonicus ‘Nanus’, or Dwarf Mondo Grass is such a hard worker in tight spaces and miniature gardens.
- Tolerates root competition well
- Slowly spreading via runners
- Easy and tough, fairly maintenance free
Enjoy, and keep an eye out for broken planters full of possibility.